

Create a Dynamic Interactive Calendar in Excel with Ease


Setting Up Your Interactive Calendar
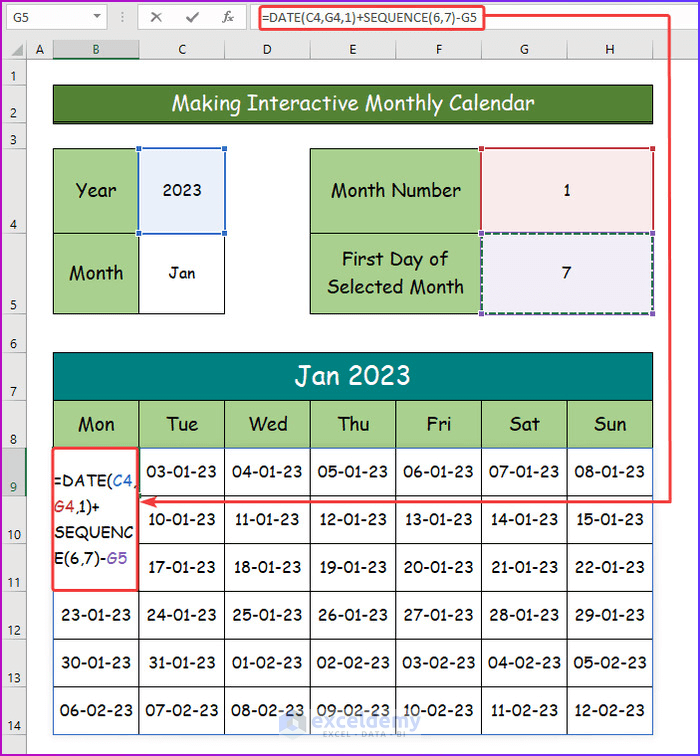
Creating an interactive calendar in Excel can be a game-changer for managing schedules, appointments, and important dates. With a few simple steps, you can design a calendar that is not only visually appealing but also functional and easy to use. To start, open a new Excel spreadsheet and set up a table with the days of the week and the dates for the month you want to create a calendar for. You can use Excel's built-in calendar template or start from scratch, depending on your needs and preferences.
To make your calendar interactive, you'll need to add some conditional formatting and formulas to highlight important dates and make it easy to navigate. For example, you can use conditional formatting to highlight weekends, holidays, or special events. You can also add formulas to automatically update the calendar as the days go by, so you don't have to manually update it every day.
Customizing and Enhancing Your Calendar
Once you have the basic structure of your calendar set up, you can start customizing it to fit your needs. You can add more features, such as a to-do list or a notes section, to make it more functional. You can also change the layout and design of the calendar to make it more visually appealing. With a little creativity, you can create a calendar that is both functional and beautiful.
With your interactive calendar up and running, you can start using it to manage your schedule and stay organized. You can share it with others, either by printing it out or by sending it to them via email. You can also use it to track appointments, meetings, and deadlines, and set reminders to ensure you never miss an important date. By following these steps and tips, you can create an interactive calendar in Excel that meets your needs and helps you stay organized and on track.