
How to Create a Calendar in Excel 2013: A Step-by-Step Guide
Setting Up Your Calendar
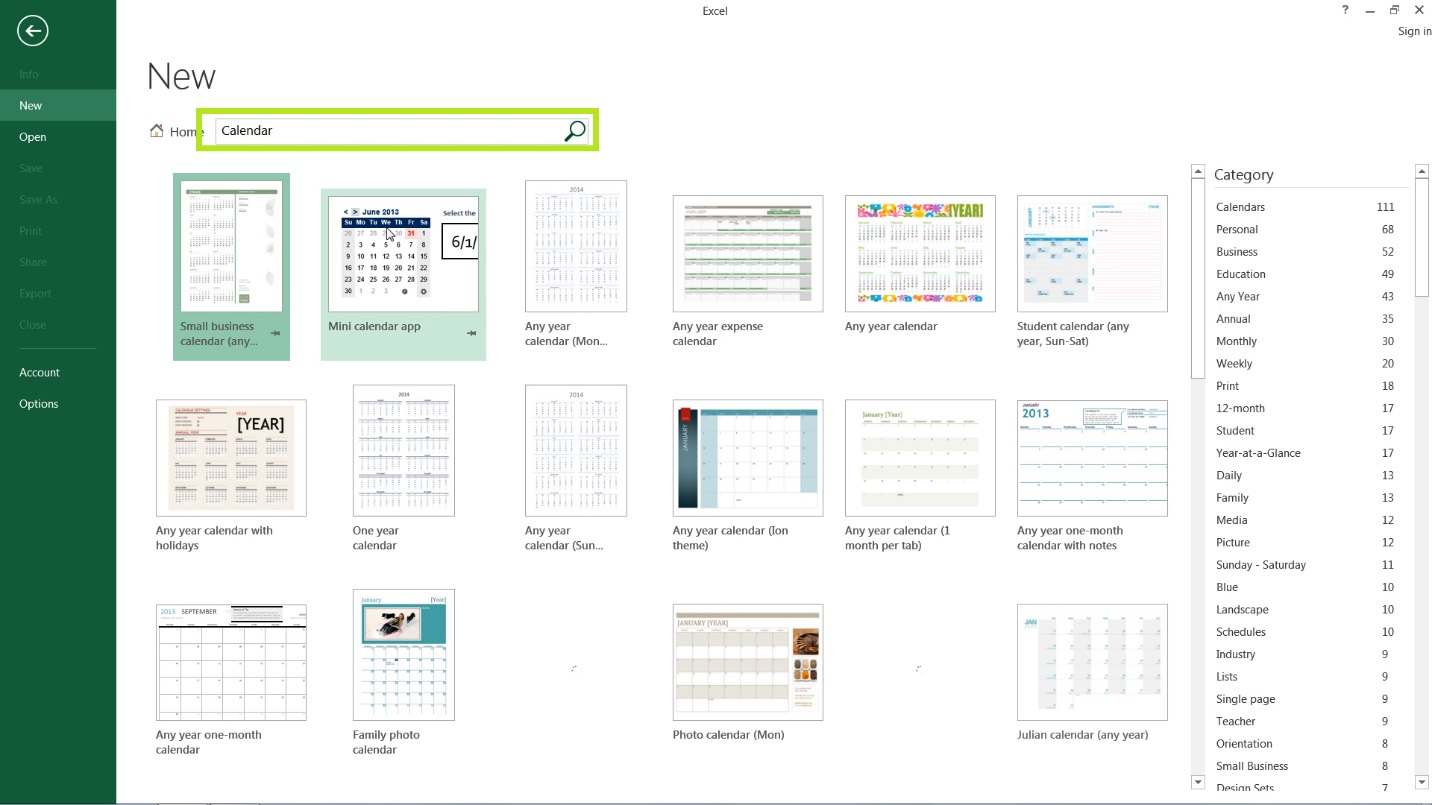
Creating a calendar in Excel 2013 is a great way to stay organized and keep track of your schedule. With a few simple steps, you can create a customizable calendar that meets your needs. To start, open Excel 2013 and create a new spreadsheet. Give your spreadsheet a name, such as 'Calendar' or 'Schedule', and set up the columns and rows to create a grid that will serve as the foundation for your calendar.
To set up your calendar, you will need to decide on the layout and format. You can choose from a variety of templates or create your own custom design. If you want to create a monthly calendar, you can set up the columns to represent the days of the week and the rows to represent the weeks of the month. You can also add headers and footers to your calendar to give it a professional look.
Customizing Your Calendar
Once you have set up the basic layout of your calendar, you can start customizing it to meet your needs. You can add formulas and functions to automatically populate the calendar with dates and days of the week. You can also add conditional formatting to highlight important dates or appointments. Additionally, you can use Excel's built-in tools to add images, charts, and other visual elements to make your calendar more engaging and interactive.
With your calendar set up and customized, you can now use it to stay organized and on track. You can use the calendar to schedule appointments, meetings, and events, and to keep track of deadlines and important dates. You can also share your calendar with others, either by printing it out or by sharing it electronically. By following these simple steps, you can create a calendar in Excel 2013 that meets your needs and helps you stay organized and productive.